Creating your own DIY projector can be an exciting and rewarding experience. Not only does it provide you with the opportunity to learn about optics and electronics, but it also gives you a unique way to project images and videos in any setting. Whether you’re planning a movie night under the stars or need a portable projector for presentations, this guide will take you from concept to screen. In this article, we will explore the steps, materials, and tips to successfully build your own DIY projector.
Understanding the Basics of Projection
How Projectors Work
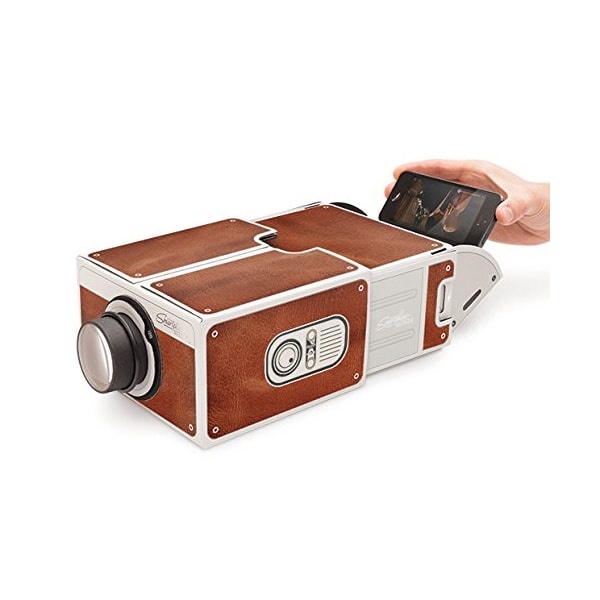
Before starting your DIY projector project, it’s important to understand the basic principles of projection. A projector magnifies an image by focusing light through a lens onto a larger surface. The essential components of a projector include a light source, a lens, and a display surface. In simpler terms, light passes through an image source (like a smartphone or tablet), gets magnified by the lens, and is cast onto a screen or wall. Knowing these fundamentals will help you make informed choices in your build.
Types of Projectors
Different types of projectors exist, including LCD, DLP, and LED projectors. DIY versions typically use low-cost components, making them ideal for beginners. For example, an LED projector can be built using a high-powered LED light source and a lens system to focus the light properly. Understanding the various types allows you to select the right components for your project, ensuring your DIY projector meets your specific needs.
Planning Your DIY Projector
Choosing Your Materials
The first step in your DIY projector journey is to gather the necessary materials. You’ll need a few key components: a high-powered LED light source, a lens (usually a convex lens), a reflective surface (such as a Fresnel lens or magnifying lens), a sturdy box or casing to house everything, and a display source like a smartphone or tablet. Many of these items can be purchased at electronics stores or online, and it’s essential to ensure compatibility among the components you choose.
Sketching the Design
Once you’ve gathered your materials, sketch out a design for your projector. Your preliminary design should include the layout of the components, the size of each part, and how they will fit together. Consider how the light source will be positioned in relation to the lens and the display source. Visualizing the arrangement will help you identify any potential challenges, such as space constraints or alignment problems, before you begin the actual assembly.
Building the Projector Housing
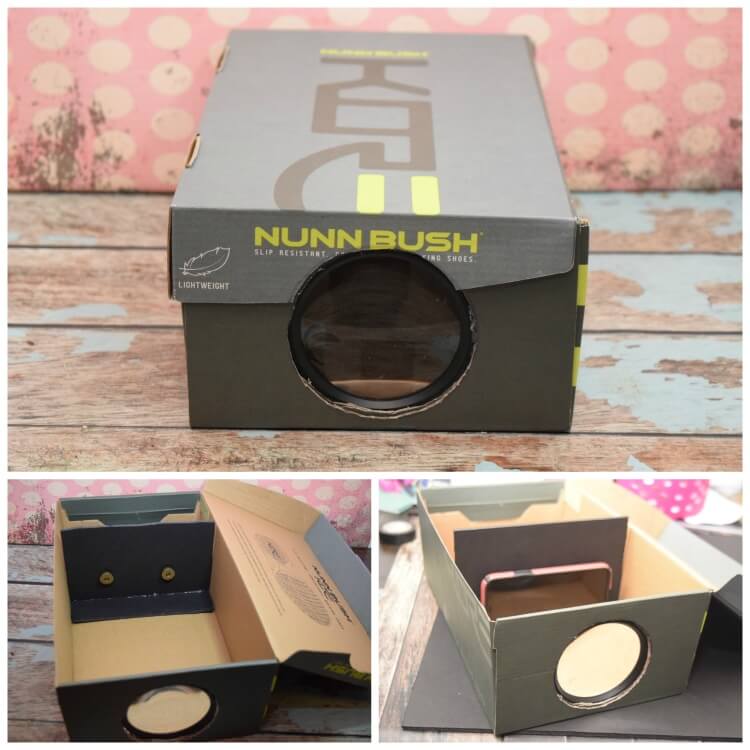
Constructing the Casing
The next step is to create a sturdy housing for your projector. Use a wooden or cardboard box to construct the casing, making sure it has enough room for the light source, lens, and display. If you’re using cardboard, be sure to reinforce areas that will hold heavy components. Moreover, you can customize your casing by painting or decorating it according to your personal taste, making it an attractive addition to your space.
Creating Ventilation
While assembling your projector, don’t forget to include ventilation. The light source will generate heat, and proper airflow is crucial to prevent overheating. Incorporate ventilation holes or grills into the design of your casing. You might also want to consider adding a small fan to improve airflow. Ensure your casing provides sufficient ventilation to maintain component longevity and stable performance.
Assembling the Components
Installing the Light Source
Start by mounting the LED light source within the casing. Position it securely and ensure it’s aligned with the lens. Pay attention to the distance between the light and the lens, as this will affect the clarity and brightness of the projected image. For optimal results, choose a powerful LED bulb that emits sufficient light, giving your projector an edge in brightness compared to others.
Setting up the Lens System
Once the light source is secured, the next step is to set up the lens. Attach the lens to the front of the casing, ensuring it’s centered. You can utilize lens holders or clamps to keep it stable. Experiment with the distance between the lens and the display source until you find the sweet spot that provides the best focus. This step may require some patience, as getting the right focus can significantly improve your projection quality.
Testing Your DIY Projector
Initial Calibration
Before your first full projection test, perform an initial calibration to ensure everything is working correctly. Connect your display source, such as your smartphone or tablet, to the projector. Project a simple image or video to check how well the light travels through the lens. Evaluate the brightness, focus, and overall clarity of the image on your screen. Take notes on what areas need adjustments so you can enhance your projection for the final test.
Fine-Tuning for Quality
After your initial test, you may need to make necessary adjustments. If the image appears too dim, consider upgrading the LED or optimizing the lens placement. If the image is fuzzy or out of focus, adjust the distance from the display source to the lens. Fine-tuning can take some time, and each adjustment can lead to better quality. Make sure to test various images and colors to ensure the projector performs well across different content types.
Enhancing Your Projection Experience
Choosing the Right Screen
To optimize your DIY projector’s performance, consider what surface you’ll project onto. A smooth, white wall can suffice, but for the best results, invest in a dedicated projection screen. These screens enhance brightness and contrast, providing a more vibrant viewing experience. You can also create a temporary projection surface using white sheets or poster boards, which can work well during movie nights.
Adding Sound
While a DIY projector focuses on visual presentation, enhancing sound quality will elevate your overall experience. Consider connecting external speakers to your video player or device for improved audio. Bluetooth or wired speakers can create immersive sound that complements the visuals. This added detail will provide an authentic movie-theater experience right in your own home or backyard.
Troubleshooting Common Issues
Addressing Common Problems
As with any DIY project, you may encounter challenges. Common issues include focus problems, low brightness, or alignment difficulties. If you struggle with focus, adjusting the distance between the lens and display or repositioning the light source can help. Should brightness be a concern, assess the LED’s power and consider switching to a brighter model. Pinpointing the most pressing issues will allow for targeted solutions, significantly improving performance.
Seeking Resources and Community Support
Don’t hesitate to seek help from online communities and resources. Numerous forums and social media groups exist for DIY enthusiasts where you can ask questions or check for solutions to similar problems faced by other builders. Engaging with these communities can provide valuable insights and sometimes even innovative ideas to enhance your projector even further.
Enjoy Your DIY Masterpiece
Building your own DIY projector can be rewarding and offers an excellent opportunity for creativity. From gathering materials to assembling the components and troubleshooting, this project enables hands-on learning and customization. Not only will you gain valuable skills during the process, but you’ll also create an entertaining device that can be enjoyed for years to come.
Once your DIY projector is complete, gather friends or family for a thrilling movie night under the stars or a fun presentation for a special event. Embrace the satisfaction of showcasing your work while enjoying high-quality images on the big screen. Now that you’re equipped with the knowledge and tools, it’s time to unleash your creativity and get started on your very own DIY projector project!